win7如何更改工作组-win7工作组更改教程?
win7系统为用户提供了工作小组的功能,用户可以通过将多台电脑连接到同一局域网,从而实现快速文件共享。那我们怎样改变工作组呢,下面一起来看看吧。
win7工作组更改教程
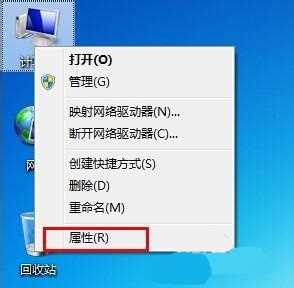
1、右键点开我们的“计算机”,打开“属性”面板。
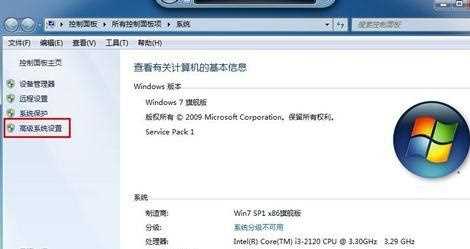
2、点击左边的“高级系统设置”
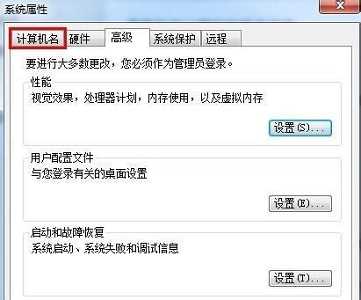
3、点击上方的“计算机名”选项卡。
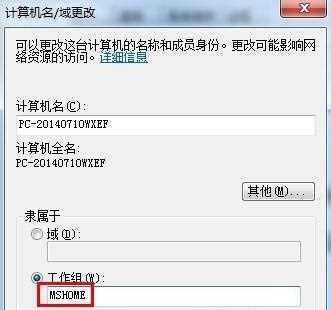
4、在图示位置查看工作组,点击“更改”
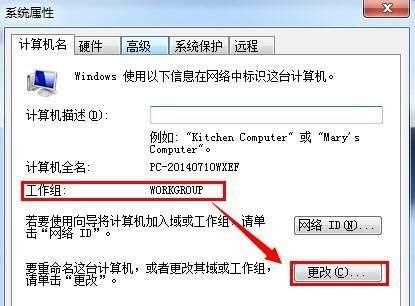
5、在下图框中位置就可以更改工作组了。
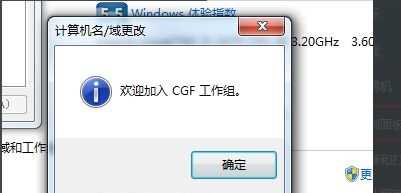
6、更改完成之后点击“确定”
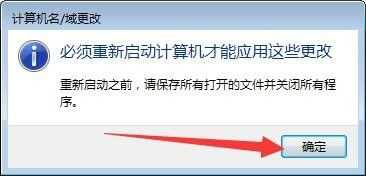
7、最后重启电脑即可。
以上就是win7工作组更改教程了,大家快去更改工作组,使用快速共享文档的功能吧。
win7工作组